 To create a custom category:
You can create a custom category on the Palm device to hold all of the Palm SFA icons. By creating custom categories, you can organize your Eclipse application Palm SFA icons to make them easier to find. After creating the category, you can move the Palm SFA icons to the new category. Now you can easily locate the Eclipse applications installed on your Palm device.
 To create a custom category:
Tap the Applications screen button on the Palm device screen to display the main Applications screen.

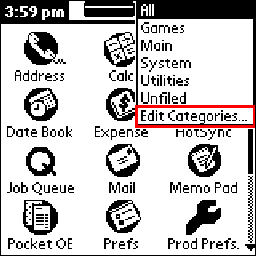
Tap the drop-down (![]() ) in the upper right corner of the screen and select Edit Categories... from the list.
) in the upper right corner of the screen and select Edit Categories... from the list.
On the Edit Categories screen, tap New.
At the prompt, enter a new category name and tap OK.
For example, enter Eclipse.
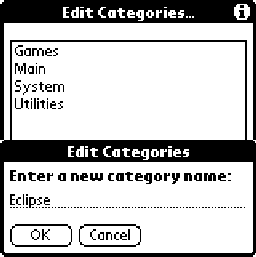
Tap OK to exit the Edit Categories... screen and return to the main Applications screen.
 To move icons to a new category:
Tap the Applications screen button on the Palm device screen to display the main Applications screen.

Tap the Menu screen button to display the Application screen menu bar.
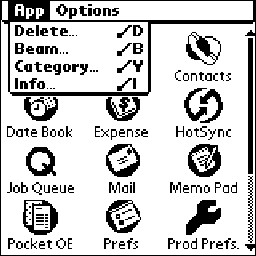
Tap App and then Category... to display the Category screen.
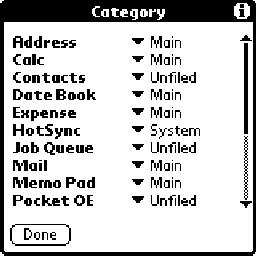
For each Palm SFA item, tap
the associated drop-down (![]() ) and select the name of the custom
category.
) and select the name of the custom
category.
The following are Palm SFA applications:
Contacts
Job Queue
Pocket OE
Prod Prefs
Scheduler
For example, if you created a custom category called Eclipse, you would tap the drop-down to the right of Contacts and select Eclipse from the drop-down.
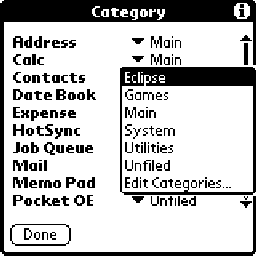
Tap Done to exit the Category screen.
 To select a Palm SFA icon from the custom
category:
Tap the Applications screen button on the Palm device screen to display the main Applications screen.
Tap the drop-down (![]() ) in the upper right corner of the screen and select the name
of your custom category.
) in the upper right corner of the screen and select the name
of your custom category.
Only those icons in your custom category display in the Application screen.
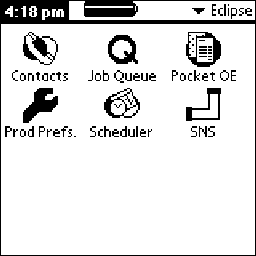
Tap an icon to start the application.
See Also: