Manually Purging Logs
Purge Maintenance provides a way to get rid of old logs in your system
that weigh down processes. We recommend purging
files on a regular basis. Log entries contain information, such as
who made changes or the changes in product costs. Delete expired maintenance
log entries or old product information from the system to reclaim disk
space on the server for other uses.
Important:
Depending on the number of files set to purge, the purging process
can take several days or weeks. The deletion process can slow
down system processes and should be run during off hours.
While you can purge logs manually,
we recommend using the Phantom Scheduler to set
up regular purging when it will least impact your company
resources. |
You can purge the following logs using Purge Maintenance:
MAINT.LOG
- File maintenance logs keep records of the changes made within files.
Maintenance logs can be purged less frequently then others, but should
at a minimum be purged every six months. MAINT.LOG specifically stores
logs for all files that are set up in File
Definition Maintenance. Make sure to check the purge options.
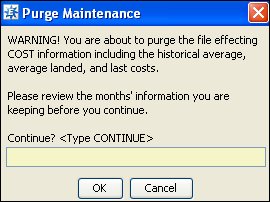
PROD.LOG
- Product log files contain the cost, quantity, and location changes
for a product as recorded in the Product Activity Log. The system
displays a warning
message when you schedule a purge.
CAUTION!! Purging the PROD.LOG could
effect your Inventory
Valuation Report if you check the history for calculated cost,
such as average costs. We recommend carefully considering the
purge before continuing. It also stores the historical average,
average landed cost, the landed cost and the last cost. |
Note: You
must have permission
to purge logs from your system. See your system administrator for more
information.
To manually purge logs:
Define
the purge parameters in File Definition Maintenance for the file
you want to purge.
From the File
> Merge/Purge menu, select Purge
Maintenance to display the Purge Maintenance screen.
In the Purge
File column, select MAINT.LOG
or PROD.LOG to populate the
Purge Maintenance window.
Note: If
no log is listed, type the file name you want to purge.
From the Option
menu, select Schedule to display
the Phantom Scheduler
and set the options for running the purge.
Save
your changes and exit the window.
Note: You
can stop a purge at any
time, if needed, however the system suspends the purge routine during
high times of processing if you use the sleep
settings when scheduling purges.
See Also:
Scheduling Maintenance Log Purges
Stopping Purge Processes