The User Control Panel provides quick access to frequently used tasks such as job queues, reports, and messaging. The Settings menu from the User Control Panel gives you access to customizing how your user-interface experience works. Using the Settings menu on the Solar Main Menu, you can access your Solar Preferences data, such as helper programs, messaging options, and setting your terminal ID.
Note: You must log off and back on for any of the following settings to take effect.
Important: In Release 9.0, the File menu options have been moved to the Settings or User Control Panel.
To set your Solar preferences:
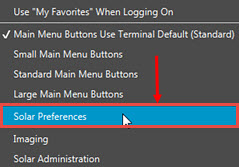
From the User Control Panel menu off the main Solar Window, select Settings >Solar Preferences to display the Preferences window.
Use the tabs to define your user experience when working with Solar:
|
Option |
Description |
|
Change your terminal ID to use a different terminal's setup defaults. For example, if a terminal's defined pricing branch is Branch 1, when a user enters a transaction on that terminal, the system applies Branch 1 pricing to the transaction. Users can override defaults, as needed. For more information about terminals, see Setting Up Terminals in this documentation. |
|
|
By default, the system selects the appropriate option based on the settings gathered when opening Solar and using the Solar Installer program. We recommend leaving the system default. If you are using Signature Capture using 64bits, we recommend selecting 64bits regardless of the setting. Also, users with more than 4 GB of RAM on their system may find better resolution using the 64bit option. Note:You must log off and back in to Solar to activate a new setting. Youdo nothave to reinstall Solar. |
|
|
FX Renderer |
|
|
JVM Args |
Informational only for Eclipse Support and administration to use during the troubleshooting process. |
|
Alternate Row Colors |
When viewing tables throughout Eclipse, you can have the color on the rows alternate. Using this option makes scanning and using queues easier. The default is to have this check box selected. |
|
Highlight Current Entry Field |
Using this selection keeps you aware of where the entry field you are working is. The system highlights the entry field in which you are working. The default is to have this check box selected. |
|
Change Font button |
Select which font you want to use for the overall window look. This changes menu selections, field options and title bars. You may want to test the font you prefer as larger fonts may effect readability for menu options. Note:The system alerts you if you select a font too large for display purposes. |
|
Use Default Font button |
To set the font back to the system-installed font, click this button. |
|
Row Selection |
With this option enabled, the system automatically highlights an entire table row that you are working on. Activating row highlighting affects all Eclipse tables. This helps you to see that you are looking at the correct information on all columns in that row. The default is set to enabled. However, you can clear the check box to disable this feature for your system. |
|
Set Color |
Select the Set Color button to choose the row highlighting color that you want. |
|
In addition to the font, use the theme options to tailor how you want the Solar windows to look when they display:
Important: Regardless of which theme you select, the system always uses the Total Solar Eclipse on the Solar Desktop. Note:
For more information about how these displays differ,
see |
Helper programs assist Eclipse in knowing what application on your system to use when opening documents. For most standard documents, the system inherently connects programs, but for some programs you must identify the extension and program manually to open as you want. For example, you may want .xml files to open in Notepad to work with the code.
|
Option |
Description |
|
Extensions |
Enter the file extension, such as .pdf, that you need to map to a program. |
|
Program to Open |
Select the program you want Eclipse to use when opening that file, such as Adobe Acrobat. |
|
Program to Open Network Path |
If the program is in a custom location use this option to select the network path to use to locate the Program to Open. |
|
Option |
Description |
|
Signature Capture Program Path |
Select the location where the signature capture program lives on your computer or network. Signature Capture is a companion product. |
|
Enable System to Display Last Validation List |
Select to allow Eclipse to display the last validation list used in validated (F10) lists. |
|
Disable Auto-Completion in Widget Search |
Select to remove the option of automatic completion when you are typing widget information into the widget search. |
|
Make Solar Main Window Always on Top |
Select to make the Solar Main Window always display on top of all other displayed windows when not actively working in another window. |
|
Hide Global Search Field from Main Window |
Select to keep the global search hidden and ensure that users only use their assigned menus. |
|
Upon Window Close, Set Focus to Next Window |
Select to force Eclipse to display the next open window in Solar when the previous window has been closed. |
|
Clear Window Sizes |
Select to clear any window sizes you have changed and saved. The system automatically saves your resized windows when exiting. |
|
Clear Window Locations |
Select to clear any window location you have saved. |
|
Option |
Description |
|
Logging Threshold Options |
Select which options for which you want to log information. By default, only the ERROR option is selected. Important: Do not set DEBUG or INFO unless instructed to do so by Eclipse Support. These are internal monitoring tools for troubleshooting and can impact Solar performance. Use the Restore Defaults button to return the Logging settings to their original options. |
For more information about Eclipse Messaging, see Eclipse Messaging in the online help documentation.
For more information about the bulletin
board, see
|
Option |
Description |
|
Enable Bulletin Board |
Select to display the bulletin board and its messages above the Category toolbar on the Solar Main Window. |
|
Message Display Duration (seconds) |
Enter how long you want the message to display before moving to the next bulletin board message. |
Click OK to save your changes.
Log out of Solar and log back in to apply your changes.
See Also: