This is an optional feature; it is not part of the baseline system. You cannot access any of the functionality described here without first purchasing this additional package.
After you purchase the Automation Studio license for Eclipse, work with Professional Services to register the license to activate the Eclipse configuration windows. There are a few steps to establish the general connection to Automation Studio, create the settings for how you are using Automation Studio, and determine who is using Automation Studio.
Professional Services will work with you to create your Automation Studio site, environment, and instance. Once this is done Automation Studio will perform a "handshake" with your Eclipse system to populate most of the settings on the API Configurations window for the Epicor Automation Studio pane.
During the registration process, permissions are established for the first user of Automation Studio. The person you have as the Automation Studio administrator and all those given access to Automation Studio need to have the Authorization Key for Admin or SuperAmin on Eclipse to access Automation Studio. In addition, you must be set up on Automation Studio as a user and given appropriate permissions.
Refer to the following sections for:
Completing the General Settings to Connect to Automation Studio
How to Access Automation Studio from Eclipse
Setting up the Webhook for your Recipe
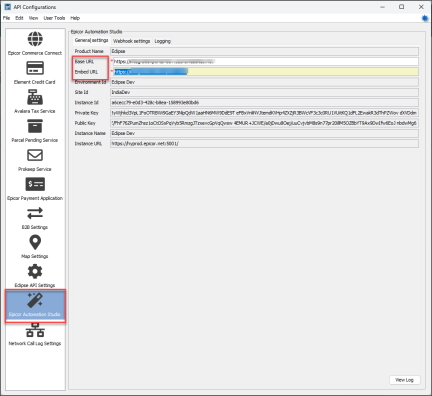
When you register the Automation Studio with Eclipse, the Epicor Automation Studio pane is available. The registration process populates most of the fields on the General Settings tab and they are read-only. These settings are unique for your company and based on your purchase information with Automation Studio.
Establish the connection between Eclipse and Automation Studio as follows.
Navigate to the API Configurations window and then select the Epicor Automation Studio pane.
There are just two fields that are open for configuration, the other fields are read-only fields and are automatically completed during the registration process.
On the General Settings tab, enter the Base URL to use for opening the Automation Studio Eclipse page.
https://api.integration.epicor.com
When you select the Automation Studio menu option in Eclipse it opens a separate Eclipse window that uses this URL.
Enter the Embed URL to use for the populating the Automation Studio page within the Eclipse Automation Studio page frame.
https://integration.epicor.com
Once you complete the registration and integration process, it is easy to access Automation Studio from Eclipse.
Navigate from the Eclipse Main Menu to System > System Programming > Add On Products > 8 - Automation Studio. Alternatively, you can access Automation Studio through the Solar Search bar. Automation Studio opens in a separate window.
Before you can execute a function or process in Eclipse using Automation Studio you need to:
Create a "Recipe" in the Automation Studio window.
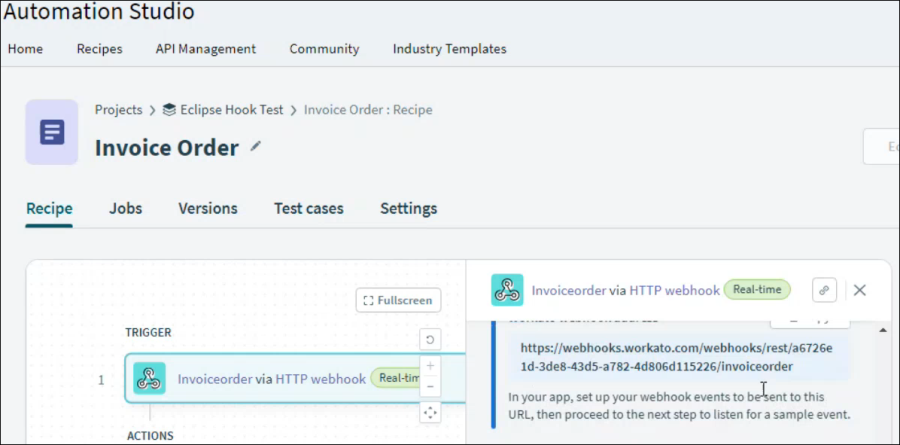
On the Recipe page in Automation Studio, copy the webhook address.
Open API Configuration to the Eclipse Automation Studio panel and select the Webhook Settings tab.
In the Value field, past the webhook that you copied from the Automation Studio recipe page.
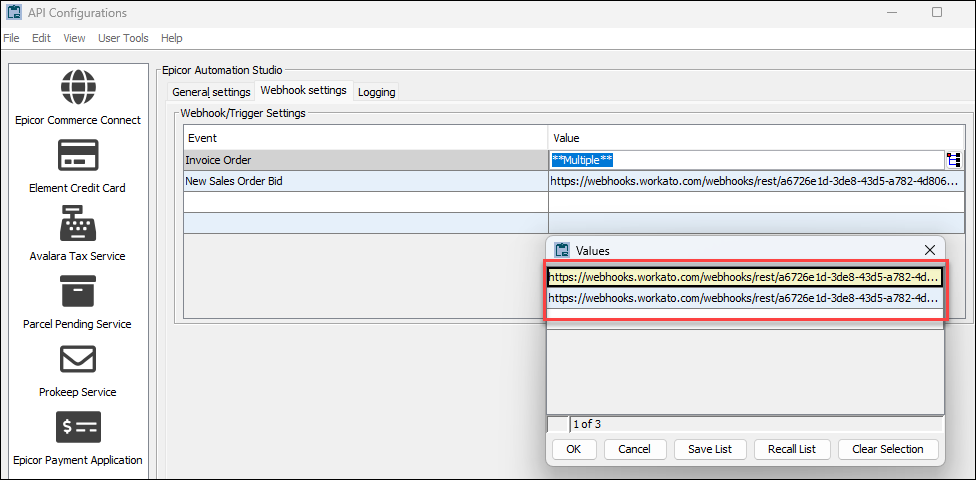
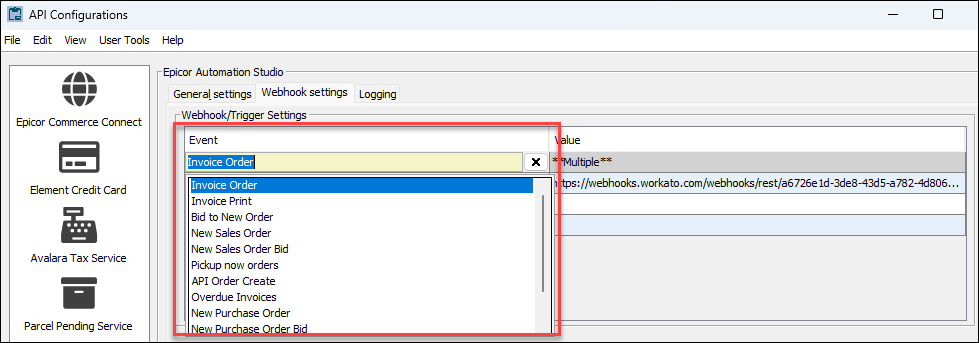
In the Event field, select the Event name that represents the recipe.
Use the Logging tab on the Epicor Automation Studio configurations to turn on and off logging for:
Automation Studio
Automation Studio Order Processed Webhook