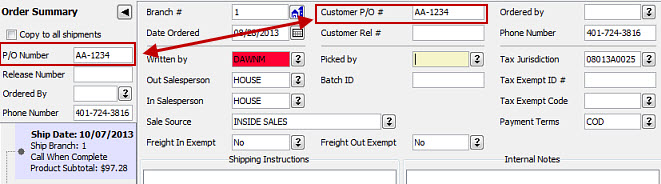
Eclipse customer purchase order (P/O) number are free-form entries. However, if your customer has a system that generates purchase orders in a certain format for material purchases, you can define the format to use. You can define the format of a customer’s P/O number, so that users entering the numbers are required to follow a specific format to keep all the customer P/O numbers consistent. Consistent P/O numbers help the Accounts Payable department match invoices and expedites the payment processes.
For example, if your customer uses an alphanumeric system with letters a dash and then numbers, such as AA-1234. Defining this format would allow users to enter SA-4579, but not S3-4579 or SA-45B6.
Note: If you want to limit the P/O numbers to a specific set, see Adding Valid P/O Numbers in this documentation.
To define customer P/O formats:
From the Maintenance menu, select Customer and display the customer record you want to add purchase order formats to.
From the Additional menu, select P/O Validation to display the Customer PO Format Validation Layout window.
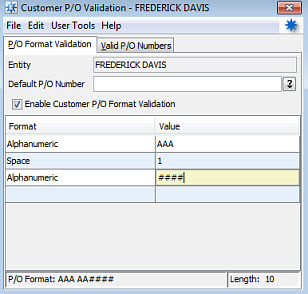
Click the P/O Format Validation tab, if not already selected.
The system displays the customer name in the Entity field.
(Optional) Use the Default P/O Number field to assign a purchase order number to every order entered for this customer. If no default P/O number is entered in this field for a ship-to customer, the system uses the default P/O number entered for the associated bill-to customer. The default P/O number is assigned to the Customer PO # field on the SOE Header tab and it can be edited.
Select the Enable Customer PO Format Validation check box to turn the P/O format functionality.
Selecting this check box ensures the system checks
all purchase order format ![]() entries
through Sales Order Entry conforms to the format indicated
on this screen.
entries
through Sales Order Entry conforms to the format indicated
on this screen.
In the Format field, select one of the following. You can use the selections in any order depending on your needs. See examples below.
Constant - Select to force the purchase order number to always have a specific value.
Space - Enter how many spaces you need in the purchase order number.
Alphanumeric - Enter the number of characters allowed for the purchase order number.
The status bar at the bottom of the window dynamically displays how the P/O number will look.
Note: If
the format is mismatched, the user ![]() receives
an error message.
receives
an error message.
In the Value field, indicate which value you want to associate to the Format. For example, if you select Space as a Format, enter the number of spaces you want in the P/O Number. The default is 1.
The following are examples to help illustrate how the P/O formatting can work for you.
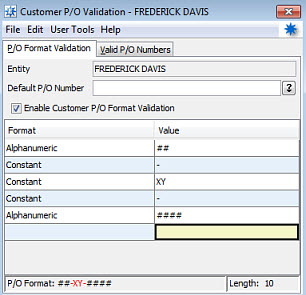
Example 1: You need the purchase order be formatted with an XY between two numbers on the right and four numbers on the left with dashes in between each piece, such as 67-XY-1234, where the XY does not ever change. Set your format like this:
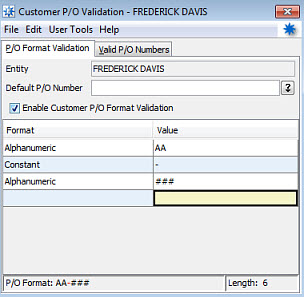
Example 2: You need the purchase order to begin with two letters, a dash, and then four numbers, such as HD-5489. Set your format like this:
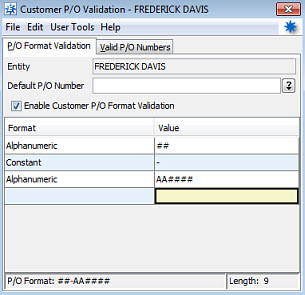
Example 3: You need the purchase order to begin with two numbers, a dash, then an alphanumeric combination with two letters and four numbers, such as 89-AB6789. Set your format like this:
Example 4: You need the purchase order to start with the Vendor initials a space and four numbers, such as KJP 5637. Set your format like this:
See Also: