
Your system administrator sets up your user name and initial password. You are prompted to change your password the first time you log in to the system, and you can later change your password at any time.
For Release 9.0 or higher, when you first login you must use your Web Start Page to install Solar Eclipse so the appropriate files are installed.
You can also log in at another user's terminal using your user name. This function is helpful when you are far away from your own terminal and need to use the system.
Note: Your system password is associated with your user profile, which determines which system screens you can access. Typically, this access only allows you to access the screens you need to complete your job functions. Many other features are controlled by the authorization assigned to your system password.
To log into the system:
Launch Solar Eclipse by double-clicking the desktop icon, or by selecting it from the Program Files menu.
In the User Name field, enter your user name. This field is case-sensitive.
In the Password field, enter your password. This field is case-sensitive.
Click OK, or press Enter.
The Solar Desktop displays. You can resize this window, as needed.
Note: Your password identifies you to the system, which then uses the information stored in your User File to determine your access to menus and printers. It also determines your security and authorization levels.
If you are logged in to other instances of Solar Eclipse, the My Logged In Sessions window displays and lists the sessions you are currently logged in to. For information about logging out of multiple Solar Eclipse sessions, see Viewing and Logging Out of Multiple Solar Eclipse Sessions.
The following prompts may display depending on your setup in User Maintenance:
|
Prompt |
Description |
|
Do you want to clock in? |
Indicate if you want to clock in and track your time on the system. Note: If you are not prompted to clock in, your site may not require it nor have the clocking system enabled. Use the |
|
Select a Location |
If you are authorized to log in to different locations, select the location from which you want to work for this session. |
|
Select a Printer |
If there is not a default printer identified for plain paper use, the system prompts you to select an appropriate printer. A plain paper printer must be selected for your session in order to print reports, forms, and other documents. |
From the System menu, select Change Password to display the Change Password window.
In the Current Password field, enter your current password.
In the New Password field, enter your new password.
In the Verify Password field, re-enter your password exactly as you entered it in the New Password field.
ClickOKto save your changes and close the window.
Note: You can also see your System Administrator to change your password.
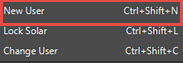
From the User Control Panel menu, select New User to display the selection window.
At the clock-out prompt, enter one of the following:
Y - Logs and clocks the current user out of the system.
N - Logs the current user out of the system without clocking that user out.
If you have access to more than one account, select the account you want to log into in the Logon Accounts screen and press Enter.
In the User Name field, enter your user name.
In the Password field, enter your password.
Click OK, or press Enter.
To log into Eterm from Solar:
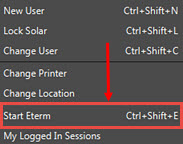
From the User Control Panel menu, select Start Eterm to display the selection window.
The Eterm Log-on window displays.
The system populates the User Name field and the System Password field, based on your input when you logged into Solar. If these fields are blank, log into Solar using the same information as you would logging into Eclipse.
Click OK. The Eclipse screen displays.
See Also:
Setting Terminals to Require Passwords After Inactivity or Pick Up Now Orders