Building the Product Lifecycle File
After creating your
lifecycle IDs, you must build your product lifecycle file from which the
system can populate the Product Lifecycle Queue. The Product Lifecycle
Build lets you select the products to display in the Product
Lifecycle Queue. Based on the Assignment Method used, you can map
a product lifecycle
directly to the products.
For example, you created a lifecycle ID called DEAD365. In the build
parameters, you set the On Hand With
No Sales In Last XX Days selection method to 365 days and the corresponding
product lifecycle to DEAD365. When the queue populates, all products falling
into this parameter have the DEAD365 lifecycle ID automatically assigned.
You can adjust the ID from the queue, if needed.
You can run the Product Lifecycle Build at any time to make the display
and filtering of the products in the product lifecycle queue faster. Only
one occurrence of the build is allowed to run. A progress bar indicates
the progress of the build or, if a build is not currently running, the
last run time information.
|
Important:Youmustrun the product lifecycle build
in order to populate the Product Lifecycle Queue.
|
To build the product lifecycle file:
-
From the Purchase
menu, select Product Lifecycle >Product Lifecycle Build to
display the Product Lifecycle Build window.
-
In the Branch/Terr/All
field, enter the branch,
branches or territories for which you want the product lifecycle
build to run.
-
Use the  main
header fields to limit what you want available
in the Product Lifecycle file from which the Product Lifecycle Queue
will gather information.
main
header fields to limit what you want available
in the Product Lifecycle file from which the Product Lifecycle Queue
will gather information.
|
Field
|
Description
|
|
Buy
Line / Price Line
|
Enter
one or more lines by which to limit the product selection
for the build. If no buy line is selected, the system
selects all products by buy line.
|
|
Order
Types
|
Select
one or more order
types you want to load: Sales
or Direct. The
default is Sales.
|
|
Product
Status
|
Select
one or more product
statuses you want to load: Stock,
NonStock, Delete, or Review.
The default is Stock and NonStock.
|
|
Product
Location Quantity Types
|
Select
one or more product
location quantity types you want to load to determine
the on-hand quantities: Stock,
Display, and
Tagged. The default
is Stock.
|
-
In the Exclude
Items area, indicate if you want to exclude items based on
the following:
-
Created
in the Last ___ Days - By default, the system excludes all
products created within the last 180 days. Those products are not
selected to display in the Product Lifecycle Queue. You can change
the number of days to extend or decrease the excluded range.
-
Received
in the Last ___ Days - By default, the system excludes all
products received on a purchase order or transfer within the last
180 days. Those products are not selected to display in the Product
Lifecycle Queue. You can change the number of days to extend or decrease
the excluded range.
-
In the Branch
Detail Level area, select one of the following to manage the
branch, branches
or territories you have selected:
This field works in conjunction with the Assignment
Method selected (step 6). If running the build for multiple branches'
or territories' detail levels, the system totals the values at all the
branches selected before comparing to each Assignment Method defined in
the build. Example
For example, you have branches 1, 2 , and 3 that each have 5 sales
of item X. Your Assignment Method is Sales
less than 10. If you ran the build on individual branches,
then all three Product/Branch records would display in the queue.
If you ran the build collectively (all three branches at once), then
none of the Product/Branch records would appear in the queue because
the system adds the sales and determines that. 5+5+5 >10.
-
Use
the table provided to assign lifecycles to products
in the file and mass assign those assignment methods to lifecycle
IDs.
|
Column
|
Details
|
|
Assignment
Method
|
Select
one or more of the following that you want to use for
selection to the file:
-
On
Hand With No Sales In Last XX Days
-
On
Hand With Sales Less Than XX in the Last YY Days
-
Days
Supply Greater Than XX
-
On
Hand Greater Than Surplus
Note:
The system requires at least one assignment method before
a build runs.
Note:
For these calculations, the system uses the purchasing
surplus calculation: line point plus the economic order
quantity (LP + EOQ) rounded to the package quantity.
|
|
Sales
|
Corresponding
with the method, the number of sales you want to identify.
For example, to define On
Hand With Sales Less Than 90 in the Last 180 Days,
type 90 in this
column.
Note:The system considers a sale to be any time
a product is on an order, regardless of the number of
line items or generations.
|
|
Days
|
Corresponding
with the method, the number of days you want to identify.
For example, to define On
Hand With Sales Less Than 90 in the Last 180 Days,
type 180 in this
column.
|
|
Lifecycle
ID
|
Select
a lifecycle for each Assignment Method defined.
|
The system displays the last build information in
the Completed Build Information
area. This section becomes a progress bar when the build is running.
-
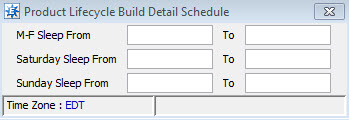
From the File
menu, select Detail Schedule
to display the Product Lifecycle Build Detail Schedule window and
define when the selection cycle should
sleep so normal business processes are unaffected.
Depending on the parameters you select and because
this build is filtering through your entire product file initially, the
build could take several hours. You can put the build to sleep during
your busiest times.
-
From the File
menu, select Build. You can
schedule
this report to run regularly.
-
Exit
the window.
See Also:
Creating Product Lifecycles
Using Product Lifecycles